Machining accuracy refers to the degree to which the actual geometric parameters (size, shape and position) of the part after processing conform to the ideal geometric parameters specified in the drawing. The higher the degree of this conformity, the higher the CNC machining accuracy.
In processing, due to the influence of various factors, it is actually impossible to process every geometric parameter of the part to exactly match the ideal geometric parameter, and there will always be some deviations. This kind of deviation is CNC machining error.

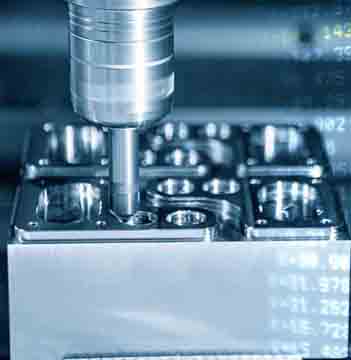
Boring of machining cavity
1. Method of obtaining part dimensional accuracy
(1) Trial cutting method
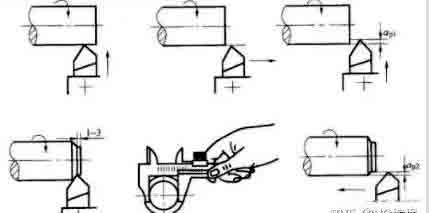
That is, first try to cut out a small part of the machined surface, and measure the size of the trial cut. Adjust the position of the cutting edge of the tool relative to the workpiece according to the processing requirements, try to cut again, and measure again. After two or three trial cuts and measurements, when the processed size meets the requirements, the entire surface of the part to be processed is then cut.
Test cutting method by “trial cut – Measurement – adjustment – again cut”, is repeated until achieve the required dimensional accuracy. For example, machining cavity boring.
The precision achieved by the trial-cut method may be very high, and it does not require a complicated device, but this method is time-consuming (requires multiple adjustments, trial cuts, measurements, and calculations) and is low in efficiency. It also depends on the skill level of the workers and the precision of the measuring instruments, and the quality is unstable, so it is only used for prototype small batch production.
As a type of trial cut method: simulated matching. It is based on the machined part, processing another matched work piece, or combining two (or more than two) work pieces together for processing. The requirement of the final processed size in simulation matching is based on the matching requirements with the processed parts.
(2) Adjustment method
Use sample or standard parts to adjust the accurate relative positions of machine tools, fixtures, cutting tools and workpieces to ensure the dimensional accuracy of the workpieces. Because the size is adjusted in advance, there is no need to try cutting again during processing, and the size is automatically obtained. And the size remains unchanged during a batch of parts processing, this is the adjustment method. For example, when using a milling machine fixture, the position of the tool is determined by the tool block. The essence of the adjustment method is to use the fixed stroke device or the tool setting device on the machine tool or the pre-set tool post. Make the tool reach a certain position accuracy relative to the machine tool or fixture, and then process a batch of workpieces.
It is also a kind of adjustment method to feed the tool according to the dial and then cut on the machine tool. This method needs to determine the scale on the dial according to the trial cut method. In mass production, tool setting devices such as fixed-range stoppers, prototypes, and templates are often used for adjustment.
The adjustment method has better processing accuracy stability and higher productivity than the trial cut method. The requirements for machine tool operators are not high, but the requirements for machine tool adjusters are high. Often used in batch production and mass production.
(3) Setting size method
The method of using the corresponding size of the tool to ensure the size of the workpiece to be processed is called the setting size method. It uses standard-sized tools for processing, and the size of the machined surface is determined by the tool size. That is, a tool with a certain dimensional accuracy (such as a reamer, a drill, etc.) is used to ensure the accuracy of the workpiece (such as a hole).
The setting size method is easy to operate, high productivity, and relatively stable processing accuracy, almost irrelevant to the skill level of the workers. With high productivity, it is widely used in various types of production. For example, drilling, reaming, etc.

The method of automatically obtaining the dimensional accuracy of CNC workpiece
(4) Active measurement method
In the process of processing, measure the processing size of the part while processing, and compare the measured result with the size required by the design. Or make the machine tool continue to work, or make the machine stop working, this is the active measurement method.
Currently, the size in active measurement can be displayed digitally. The active measurement method adds the measurement device to the process system (that is, the unity of machine tools, tools, fixtures and workpieces) and becomes its fifth factor.
Active measurement method has stable quality and high productivity, which is the development direction.
(5) Automatic control method
This method is composed of measuring device, feeding device and control system. It combines the measuring, feeding device and control system into an automatic processing system, and the processing process is automatically completed by the system.
A series of tasks such as size measurement, tool compensation adjustment, cutting processing, and machine stoppage are automatically completed, automatically achieving the required dimensional accuracy. For example, when processing on a CNC machine tool, parts are controlled by various instructions of the program to control the processing sequence and processing accuracy.
There are two specific methods of automatic control:
① Automatic measurement means that the machine has a device for automatically measuring the size of the workpiece. When the workpiece reaches the required size, the measuring device will issue an instruction to make the machine tool retract automatically and stop working.
② Digital control means that there are servo motors, rolling screw nuts and a complete set of digital control devices in the machine tool to control the precise movement of the tool post or worktable. The acquisition of dimensions (movement of the tool post or movement of the worktable) is automatically controlled by a pre-programmed program through a computer digital control device.
The initial automatic control method was completed by using active measurement and mechanical or hydraulic control systems. Pre-arranged procedures according to processing requirements have been widely used. A program controlled machine tool issued by the control system to perform work or a digitally controlled machine tool issued by a control system to perform digital information instructions. And it can adapt to the change of processing conditions in the process of processing, automatically adjust the processing amount, and realize the optimization of the processing process according to the specified conditions.
The automatic control method processing has stable quality, high productivity, good processing flexibility, and can adapt to multi-variety production. It is the current development direction of mechanical manufacturing and the basis of computer-aided manufacturing (CAM).
 English
 العربية
 中文(漢字)
 Čeština
 Dansk
Dansk Nederlands
 Suomi
Suomi Français
 Deutsch
 Italiano
 日本語
日本語 ಕನ್ನಡ
ಕನ್ನಡ 한국어
한국어 Português
 Русский
 Slovenčina
 Español
 Svenska
 Türkçe

