製品カテゴリ
- スタンピングダイ 0
- チタン合金部品 4
- ステンレス鋼部品 5
- アルミフライス部品 14
- CNC旋削サービス 16
- CNCフライス加工サービス 31
- CNCスタンピングサービス 0
- CNC板金 0
- ラピッドプロトタイピング 12
小型精密部品の CNC 旋削用ツールの選択
一般的に使用される CNC 旋削工具は、一般に 3 つのカテゴリに分類されます。: 成形工具, 尖った道具, 円弧ツールと3種類. 成形旋削工具は試作旋削工具とも呼ばれます. 加工部品の輪郭形状は旋削工具の刃の形状と大きさで完全に決まります。. CNC旋削加工では, 一般的な成形旋削工具には小半径円弧旋削工具が含まれます, 非長方形旋削工具およびねじ切り工具.
How to choose tools for CNC turning?
一般的に使用される CNC 旋削工具は、一般に 3 つのカテゴリに分類されます。: 成形工具, 尖った道具, 円弧ツールと3種類. 成形旋削工具は試作旋削工具とも呼ばれます. 加工部品の輪郭形状は旋削工具の刃の形状と大きさで完全に決まります。. CNC旋削加工では, 一般的な成形旋削工具には小半径円弧旋削工具が含まれます, 非長方形旋削工具およびねじ切り工具. CNC加工では, the forming turning tool should be used as little as possible or not. The pointed turning tool is a turning tool characterized by a straight cutting edge. The tip of this type of turning tool is composed of linear main and secondary cutting edges. のような 900 type internal and external turning tools, left and right face turning tools, grooving (cutting) turning tools, and various external and internal turning tools with a small tip chamfer. The method of selecting geometric parameters (mainly geometric angle) of the pointed turning tool is basically the same as that of ordinary turning. しかし, the characteristics of CNC machining (such as machining route, machining interference, 等) should be fully considered, and the strength of the tool tip itself should be taken into account.
The second is the arc-shaped turning tool. The arc-shaped turning tool is a turning tool characterized by an arc-shaped cutting edge with a small roundness or line profile error. Each point of the arc edge of the turning tool is the tip of the arc-shaped turning tool. Accordingly, the tool position point is not on the arc, but on the center of the arc. The arc-shaped turning tool can be used for turning inner and outer surfaces, and is especially suitable for turning various smooth connection (concave) forming surfaces. When choosing the arc radius of the turning tool, consider that the arc radius of the cutting edge of the two-point turning tool should be less than or equal to the minimum radius of curvature on the concave contour of the part to avoid machining interference. The radius should not be too small, otherwise it will not only be difficult to manufacture, but also the turning tool will be damaged due to weak tool tip strength or poor heat dissipation capacity of the tool body.
The amount of CNC cutting
In NC programming, the programmer must determine the cutting amount of each process and write it in the program in the form of instructions. Cutting parameters include spindle speed, back-cutting amount and feed speed. For different processing methods, different cutting parameters need to be selected.
The selection principle of cutting amount is:
Ensure the machining accuracy and surface roughness of the parts, give full play to the cutting performance of the tool, ensure reasonable tool durability, and give full play to the performance of the machine tool to maximize productivity and reduce costs.
1. Determine the spindle speed
The spindle speed should be selected according to the allowable cutting speed and the diameter of the workpiece (or tool).
The calculation formula is: n=1000 v/7 1D
どこ: v is the cutting speed, the unit is m/m movement, which is determined by the durability of the tool; n one spindle speed, the unit is r/min, D is the diameter of the workpiece or the tool diameter in mm. For the calculated spindle speed n, the speed that the machine tool has or is close should be selected at last.
2. Determine the feed rate
Feed speed is an important parameter in the cutting parameters of CNC machine tools, which is mainly selected according to the machining accuracy and surface roughness requirements of the parts and the material properties of the tools and workpieces. The maximum feed rate is limited by the rigidity of the machine tool and the performance of the feed system. The principle of determining the feed rate: When the quality requirement of the workpiece can be guaranteed, in order to improve the production efficiency, a higher feed speed can be selected. Generally selected in the range of 100-200mm/min; カットするとき, processing deep holes or processing with high-speed steel tools, a lower feed rate should be selected, generally in the range of 20-50mm/min; When the machining accuracy and surface roughness are required to be high, the feed speed should be smaller, generally in the range of 20-50mm/min; When the tool is idling, especially for long-distance "zero return", the maximum feed rate set by the CNC system of the machine tool can be set.
3. Determine the depth of cut
The depth of cut is determined by the rigidity of the machine tool, workpiece and tool. Under the condition that the rigidity allows, the amount of back-grabbing should be equal to the machining allowance of the workpiece as much as possible, which can reduce the number of passes and improve production efficiency. In order to ensure the quality of the processed surface, a small amount of finishing allowance can be left, generally 0.2-0.5mm. 要するに, the specific value of cutting parameters should be determined by analogy based on the performance of the machine tool, related manuals and combined with actual experience.
同時に, the spindle speed, cutting depth and feed speed can be adapted to each other to form the best cutting parameters.
Cutting amount is not only an important parameter that must be determined before machine tool adjustment, but also whether its value is reasonable or not has a very important influence on processing quality, processing efficiency, and production cost. による "reasonable" amount refers to take advantage of cutting tools and cutting tool power performance (power, torque), to ensure the quality of the premise, to achieve high productivity and low cost of the cutting amount of the processing.

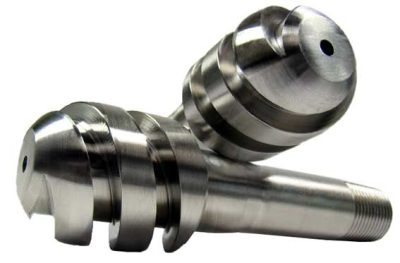
複雑なアルミニウム部品の旋削加工

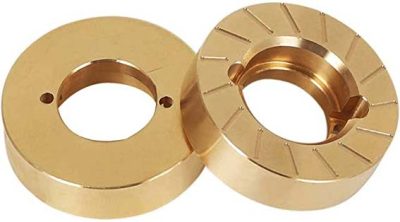
swiss turning copper product

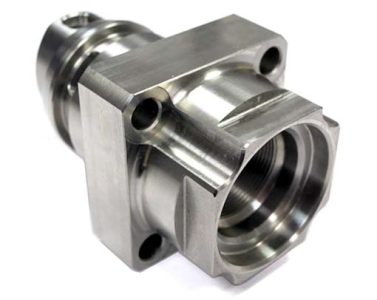
turning precision stainless steel parts

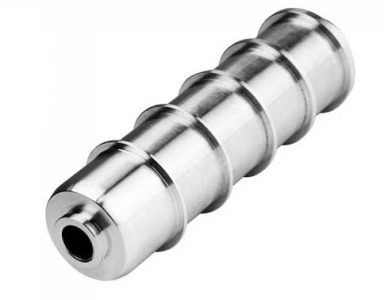
turning complex metal product
お問い合わせ
メールを待っています, 以内に返信させていただきます 12 必要な貴重な情報を何時間も入手できる.
 English
 العربية
 中文(漢字)
 Čeština
 Dansk
Dansk Nederlands
 Suomi
Suomi Français
 Deutsch
 Italiano
 日本語
日本語 ಕನ್ನಡ
ಕನ್ನಡ 한국어
한국어 Português
 Русский
 Slovenčina
 Español
 Svenska
 Türkçe


