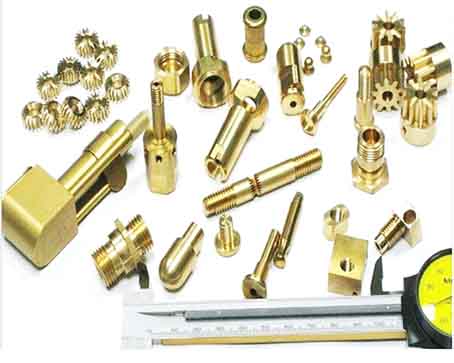
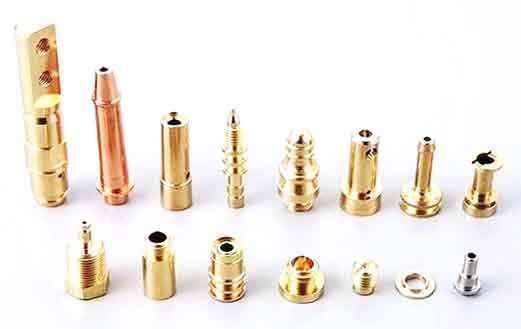
近年では, 民間防衛をはじめとする各種分野で、製品の小型化・多様化するCNC加工の需要が高まり続けています, 小さなデバイスの機能, 構造の複雑さ, 信頼性の要件も高まっています. したがって, 経済的に実現可能な微細加工技術を研究開発することは非常に重要です, 3次元幾何形状や多様な材質の加工が可能, 特徴のサイズはマイクロメートルからミリメートルまで. 現在のところ, マイクロカッティングはMEMS技術の限界を克服する重要な技術となっている. The micro-turning and milling technology has become a very active research hotspot because of its high efficiency, high flexibility, and the ability to process complex three-dimensional shapes and a variety of materials.

小型精密時計の旋削とフライス加工, 携帯電話の部品
In 1959, Richard P Feynman (winner of the Nobel Prize in Physics in 1965) proposed the idea of micromachines. The first silicon miniature pressure sensor came out in 1962, and the climate developed micro-machines such as gears, gear pumps, pneumatic turbines and couplings with a size of 50-500μm. In 1965, Stanford University developed a silicon brain electrode probe, and later succeeded in scanning tunneling microscopes and miniature sensors. In 1987, the University of California at Berkeley developed a silicon miniature electrostatic machine with a rotor diameter of 60-12μm. It shows the potential of using silicon micromachining technology to manufacture small movable structures and compatible with integrated circuits to manufacture tiny systems.
The research and application of traditional micro-milling and turning technologies are mainly: micro-end milling cutters with diameters ranging from tens of microns to 1 mm are used for micro-finishing on conventional ultra-precision machine tools. Since these machine tools are mainly used to process non-small geometrical parts with high precision, they usually require expensive design and manufacturing processes to achieve the desired target accuracy. For the processing of tiny parts, it lacks the necessary flexibility, and the processing cost is high and the efficiency is low. Miniaturized processing equipment has the advantages of saving space, saving energy, easy to reorganize, and low cost. 近年では, the use of micro-machining equipment to achieve micro-milling and turning processing has attracted widespread attention, and the use of micro-tools on micro-machine tools has realized the micro-machining process. In the research of micro-milling and turning processing technology, the research focuses mainly on the surface quality, 切削抵抗, tool wear and life, chip state, and processing ability of small parts.

Machining of tiny precision parts
In the process of milling and turning, the load state of the tool is extremely complicated, and it is constantly subjected to mechanical and thermal shock loads of different sizes and positions. Because the feed per tooth in micro milling and turning is less than (or equal to) the radius of the cutting edge of the tool, the cutting process changes from shearing to friction, extrusion or ploughing;
加えて, due to the high cutting speed and large impact load, the micro-cutting force is very different from the traditional milling force.
Bao and Tansel studied the cutting force when using micro-diameter end mills for micro-milling, and proposed an improved cutting force model. The model is obtained by calculating the chip thickness changes caused by the tool nose trajectory when the tool rotates and moves forward. 加えて, the influence of the ratio of feed per tooth to tool radius, tool runout and tool wear on cutting force is considered, and experiments have verified that the model is more accurate than the traditional end milling model.
Vogler et al. proposed a mechanical model for micro-end milling, taking into account different phases in heterogeneous materials. It is found that the multi-phase in the metal material causes the high-frequency change of the cutting force, which explains the high-frequency signal that appears in the cutting force when the multi-phase material is micro-milled.
現在のところ, there is not much research on the micro-milling force, and it is necessary to further understand the characteristics of the micro-cutting force. And it can be considered through real-time monitoring of the cutting force to dynamically adjust the cutting amount to control the cutting force, improve the quality of the machined surface, and extend the service life of the tool.
When using a small-diameter end mill for micro-machining, it is very difficult to trim the machined surface after cutting, so it is hoped that the final machining process can be completed with a milling cutter. さらに, the cutting time for high-precision shape machining often takes several hours, so higher requirements are put forward on the tool life and cutting performance.
Rahman et al. conducted micro-milling experiments on pure copper using an end mill with a diameter of 1 んん. Using the response surface method in statistics, a quadratic model of tool life in the process of pure copper micro-milling was established. It is concluded that the cutting speed and the amount of back-grabbing have a significant impact on the tool life, while the feed rate has no significant impact. The cutting edge shows an increase in cutting force after blunting. 同時に, the diameter and cutting edge size of the micro tool should be considered. Zhou et al. used an end mill with a diameter of 2 mm to mill graphite electrodes at high speed. It is pointed out that tool wear is dominated by abrasive wear, and the wear patterns are flank wear, rake face wear, micro-cracking and breakage. The chip shapes are lumpy, columnar, spherical and flake; the life of the coated tool is 1.5 times that of the uncoated tool; It is proposed that the use of an air jet nozzle and a vacuum cleaner can effectively reduce the wear and damage of the tool. Miyaguchi et al. pointed out that tool life can be extended by reducing tool stiffness. Due to the low stiffness of the tool, the bending of the tool balances the cutting force and adjusts the influence of runout, resulting in uniform wear of the two cutting edges.
In the micro-milling process of micro-tools, the chip state is an important factor to realize precision machining, control the machining process, and judge the machining ability. Kim et al. conducted an experimental study on chip formation during micro-milling. Milling grooves on brass workpieces with different feed rates, measuring by collecting chips and observing the SEM image of the bottom surface of the groove. When the feed per tooth is less than the blunt radius of the cutting edge, the actual CNC chip volume is several times the nominal chip volume, and the interval of the feed marks is also greater than the feed per tooth. As the feed per tooth increases, the actual chip volume gradually approaches the nominal chip volume. It can be seen that in micro-milling, chips are not always formed during the feed with a small feed per tooth, あれは, the formation of CNC chips is intermittent and intermittent.
In order to improve the quality of micro-milling processing, the wear and life of the tool must be studied. It can be considered to study the wear and breakage of the tool through cutting force, surface roughness, and tool vibration.
 English
 العربية
 中文(漢字)
 Čeština
 Dansk
Dansk Nederlands
 Suomi
Suomi Français
 Deutsch
 Italiano
 日本語
日本語 ಕನ್ನಡ
ಕನ್ನಡ 한국어
한국어 Português
 Русский
 Slovenčina
 Español
 Svenska
 Türkçe

