Alumiinikomponenttien muodonmuutoksille on monia syitä, jotka liittyvät materiaaliin, käsittelytyökalu, osan muoto, ja käsittelylaitteet. Pääasiassa on seuraavat näkökohdat: Aihion sisäisen jännityksen aiheuttama muodonmuutos, leikkausvoiman ja leikkauslämmön aiheuttama muodonmuutos, ja puristusvoiman aiheuttama muodonmuutos.
One, Process measures to reduce processing deformation
1. Reduce internal stress of aluminum blank
Natural or artificial aging and vibration treatment can partially eliminate the internal stress of the blank. Pre-processing is also an effective process method. For large blanks, due to the large margin, the deformation after processing is also large. If the excess part of the blank is processed in advance and the margin of each part is reduced, the processing deformation in the subsequent process can be reduced. Lisäksi, after pre-processing and placing it for a period of time, part of the internal stress can also be released.
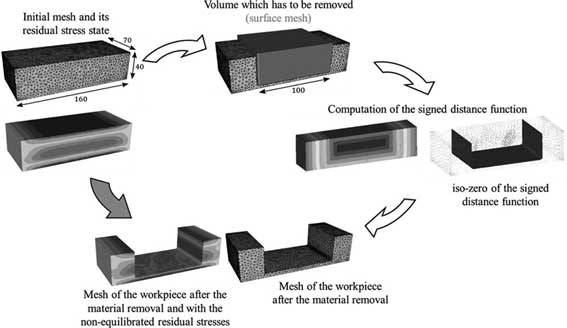
Reasons for milling deformation of aluminum parts
2. Improve the cutting ability of the tool
The material and geometric parameters of the tool have an important influence on the cutting force and cutting heat. The correct choice of tools is essential to reduce the deformation of parts.
(1) Reasonably choose the tool geometry parameters.
① The rake angle of the tool: Under the condition of maintaining the strength of the blade, the rake angle should be appropriately larger. Toisaalta, it can grind sharp cutting edges, and on the other hand, it can reduce cutting deformation, make chip removal smooth, and then reduce cutting force and cutting temperature. Never use negative rake angle tools.
② The clearance angle of the tool: The size of the relief angle has a direct effect on the wear of the flank surface and the quality of the machined surface. Cutting thickness is an important condition for selecting the relief angle. During rough milling, due to the large feed rate, heavy cutting load and large heat generation, good heat dissipation conditions of the tool are required. Siksi, the angle of the relief angle should be smaller. When finishing milling, the cutting edge is required to be sharp, reduce the friction between the flank face and the machined surface, and reduce the elastic deformation. Siksi, the angle of the relief angle should be selected larger.
③ The helix angle of the tool: In order to make the milling smooth and reduce the milling force, the helix angle should be selected as large as possible.
④The entering angle of the tool:
Properly reducing the entering angle of the tool can improve the heat dissipation conditions and reduce the average temperature of the processing area.
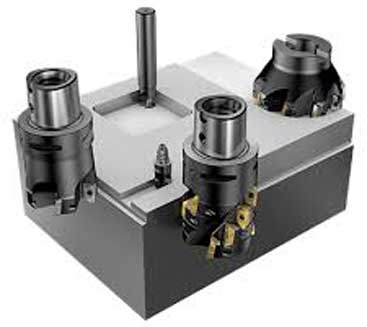
Cutting ability of milling tool
(2) Improve the tool structure.
①Reduce the number of teeth of the milling cutter and increase the chip space. Due to the large plasticity of aluminum materials, large cutting deformation during processing, and larger chip-capacity space is required, so the bottom radius of the chip-accepting flute should be larger and the number of milling cutter teeth should be smaller.
② Finely sharpen the teeth. The roughness value of the cutting edge of the cutter tooth should be less than Ra=0.4um. Before using a new knife, you should use a fine oil stone to gently grind the front and back of the knife’s teeth to eliminate the residual burrs and slight serrations when the knife is sharpened. Tällä tavalla, not only can the cutting heat be reduced, but also the cutting deformation is relatively small.
③ Strictly control tool wear standards. After the tool is worn, the surface roughness value of the workpiece increases, leikkauslämpötila nousee, and the deformation of the workpiece increases. Siksi, in addition to the selection of tool materials with good wear resistance, the tool wear standard should not be greater than 0.2mm, otherwise it is easy to produce accumulated chip edges. When cutting, the temperature of the workpiece should generally not exceed 100°C to prevent deformation.
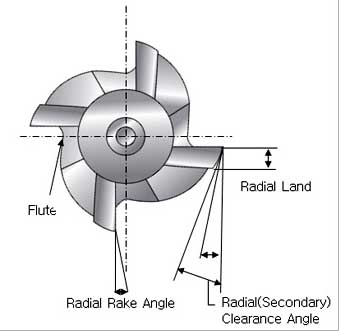
Jyrsintätyökalujen geometriset parametrit
3. Improve the clamping method of the workpiece
For thin-walled aluminum workpieces with poor rigidity, the following clamping methods can be used to reduce deformation:
① For thin-walled bushing parts, if a three-jaw self-centering chuck or spring chuck is used to clamp from the radial direction, once it is released after processing, the workpiece will inevitably be deformed. Tällä hetkellä, the method of pressing the axial end face with better rigidity should be used. To locate the inner hole of the part, make a self-made threaded through mandrel, sleeve it into the inner hole of the part, press the end face with a cover plate and then tighten it with a nut. The clamping deformation can be avoided when the outer circle is processed, thereby obtaining satisfactory processing accuracy.
② When processing thin-walled and thin-plate cavity workpieces, it is best to use vacuum suction cups to obtain evenly distributed clamping force, and then process with a smaller cutting amount, which can well prevent workpiece deformation.
Lisäksi, a packing method can also be used. In order to increase the process rigidity of thin-walled workpieces, medium can be filled inside the workpiece to reduce the deformation of the workpiece during clamping and cutting. Esimerkiksi, pour a urea melt containing 3% to 6% potassium nitrate into the workpiece, and after processing, immerse the workpiece in water or alcohol to dissolve the filler and pour it out.
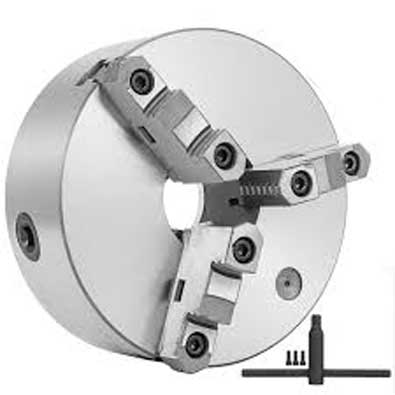
Three-jaw self-centering chuck
4. Reasonable arrangement of processing procedures
During high-speed cutting, due to the large machining allowance and intermittent cutting, the milling process often produces vibration, which affects the machining accuracy and surface roughness. Siksi, the CNC high-speed cutting process can generally be divided into: Rough machining-semi-finish machining-clear corner processing-finishing and other processes. For parts with high precision requirements, it is sometimes necessary to perform secondary semi-finishing and then finishing. After rough machining, the parts can be cooled naturally to eliminate internal stress caused by rough machining and reduce deformation. The margin left after rough machining should be greater than the amount of deformation, yleisesti 1 to 2 mm. During finishing, the finishing surface of the part should maintain a uniform machining allowance, generally 0.2-0.5mm is appropriate, so that the tool is in a stable state during the machining process. It can greatly reduce cutting deformation, obtain good surface processing quality, and ensure product accuracy.
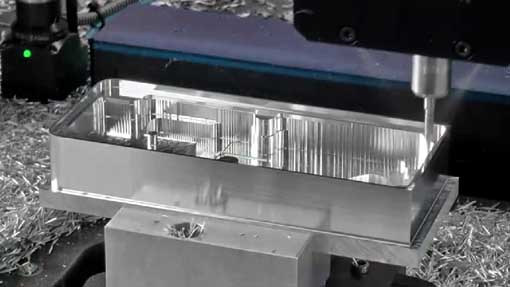
High-speed cutting of aluminum parts
 English
 العربية
 中文(漢字)
 Čeština
 Dansk
Dansk Nederlands
 Suomi
Suomi Français
 Deutsch
 Italiano
 日本語
日本語 ಕನ್ನಡ
ಕನ್ನಡ 한국어
한국어 Português
 Русский
 Slovenčina
 Español
 Svenska
 Türkçe

