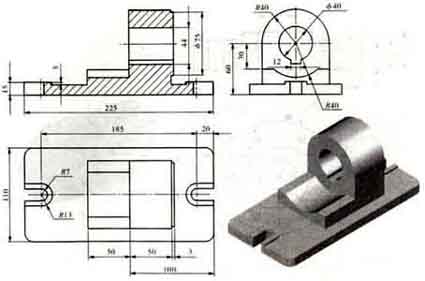
Do you understand the customer’s CNC machined parts drawings?
Reading the customer’s drawings of mechanical parts and choosing the correct turning, jyrsintä, hiominen, poraus, hiominen, and polishing of the products are the most important steps to complete the processing of the parts. Welcome customers to provide drawings and samples, and we will provide you with high-quality CNC machining services. The following analyzes the CNC machining design of several precision parts drawings.
text

Drawings of machined parts
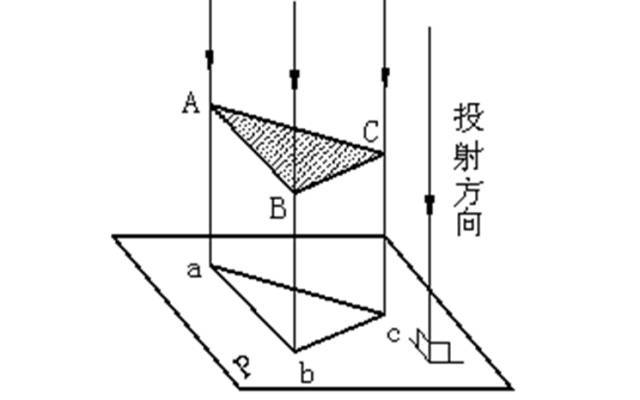
Part orthographic projection method
When the parts are projected, the projection lines are parallel to each other, and the projection line is perpendicular to the projection surface.

Part orthographic projection method
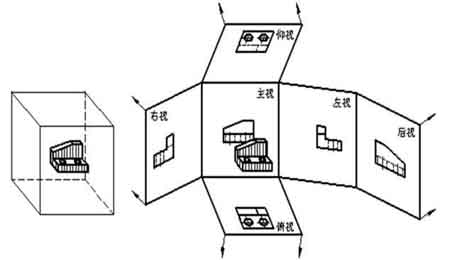
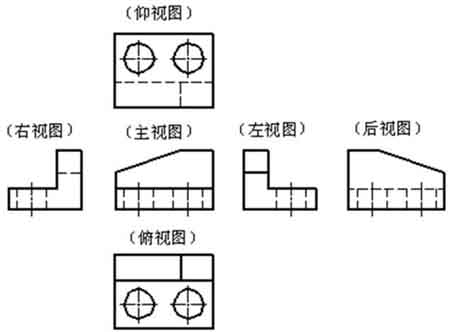
1. Basic view of the part

Basic view of the part
2. Directional view of the part
3. Partial view of the part
4. Oblique view of the part
5. Sectional view of the part
1) Full section view of the part
2) Half-section view of the part

Directional view of the part
3) Partial cross-sectional view of the part
4) Step section of parts
5) Rotating section of the part
6. Sectional view of the part.
Imagine using a cutting plane device to cut a part somewhere. Only draw the projection of the cross-section shape, and draw the figure with the specified cross-section symbol, which is called the cross-section view, or cross-section for short.
General steps and methods for reading parts drawings
(1) First check the title bar of the figure to get an overview of the part
Look at the title bar to learn about part names, materiaaleja, and proportions. So as to understand the function of the part in general, and judge which kind of part the part belongs to from the name. Judge the general CNC machining method of the part from the material. Judging the actual size of the part from the proportion, so as to have a preliminary understanding of the part.
(2) Analyze and study each view, imagine the structure and shape
Look at the view, analyze the configuration of each view of the part and the relationship between the views, and use the expression method of content. Use the combined method of reading drawings, shape analysis and line surface analysis to understand the structure of each part of the part, and imagine the shape, relative position and function of each part of the part.
(3) Analyze the size of all parts and find out the size requirements
Analyze the view and shape comprehensively, and analyze the dimension benchmarks of the length, width, and height of the part. Sitten, starting from the benchmark, using the structural shape analysis as a clue, we then understand the shape and positioning dimensions of each body, and clarify the role of each size. The graphics and dimensions express the shape and size of the part. The view, koko, and shape structure should be combined and analyzed when reading a picture.
(4) Analyze the technical requirements of the parts, and comprehensively understand the whole picture
When reading the drawings, the technical requirements such as surface roughness, dimensional tolerances, shape and position tolerances should be clarified. Understand the meaning of its code names. Jos välttämätöntä, contact the customer to analyze the parts related to the part.
 English
 العربية
 中文(漢字)
 Čeština
 Dansk
Dansk Nederlands
 Suomi
Suomi Français
 Deutsch
 Italiano
 日本語
日本語 ಕನ್ನಡ
ಕನ್ನಡ 한국어
한국어 Português
 Русский
 Slovenčina
 Español
 Svenska
 Türkçe

