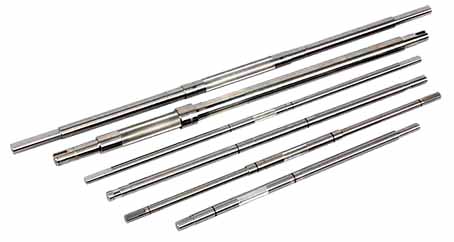
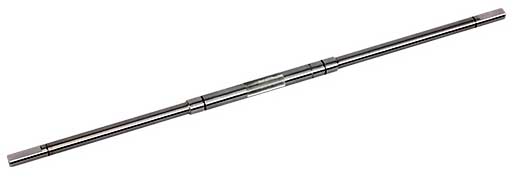
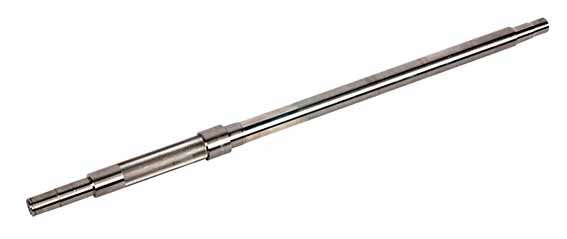
What is a slender shaft for lathe machining?
Podlouhlým hřídelem se rozumí hřídel, jehož poměr délky k průměru je větší než 25 (ie L/D>25).
Například vodicí šroub, hladká tyč, atd. na soustruhu. Kvůli špatné tuhosti štíhlého hřídele, působením a vlivem točivé síly se snadno deformuje, řezné teplo a vibrace při soustružení. Machining errors such as straightness and concentricity appear. It is difficult to meet the technical requirements such as geometric tolerances and surface quality on the drawing, which makes turning processing very difficult. The larger the L/d value, the more difficult the turning process.

Technologie pro soustružení štíhlých hřídelí
V procesu CNC obrábění, it is affected by multiple factors such as machine tools and turning tools. The workpiece is prone to defects such as curved waist drum shape, polygonal shape, slub shape and so on. Especially in the grinding process, the general size is poor, and the surface roughness is required to be higher. Navíc, because the workpiece generally requires heat treatment requirements such as quenching and tempering during grinding, the cutting heat during grinding is more likely to cause deformation of the workpiece and so on. In order to prevent the bending deformation during processing, the technicians of our factory take measures from the aspects of fixtures, strojní stroje, process methods, operation techniques, turning tools and cutting volume.

Concentricity and perpendicularity of turning slender shaft
Improved method of turning
When CNC turning a slender shaft, the clamping method of clamping one end and tightening one end is adopted. When clamping the workpiece with a chuck, an open wind wire ring is inserted between the jaw and the workpiece to reduce the axial angle length between the workpiece and the jaw. An elastic center is used for clamping on the tailstock, so that when the workpiece is stretched by the cutting heat, the thimble can expand and contract in the axial direction to compensate for the working pavilion shape and reduce the bending of the workpiece.
Follow the knife rest
The follower is an auxiliary device of the lathe. It is used to support the workpiece near the cutting point of the tool and move longitudinally with the carriage slide. The supporting piece where the tool rest is in contact with the workpiece is generally made of wear-resistant ductile iron or bronze. The arc of the supporting claw should be ground and matched with the outer circle after rough turning to avoid scratching the workpiece. The follower tool holder can offset the influence of the radial cutting component force and the weight of the workpiece during machining, thereby reducing cutting vibration and workpiece deformation. But it must be carefully adjusted to keep the center of the follower tool holder consistent with the center of the thimble of the machine tool.

Difficulty of CNC machining of slender shaft
Angle of turning tool
In order to reduce the radial cutting force, a larger entering angle should be selected; The rake face should be ground with a chipbreaker R=1.5-3mm, and the rake angle is generally γ0=150-300; The cutting edge angle λs takes a positive value to make the chips flow to the surface to be machined; The surface roughness value of the turning tool should be small, and the cutting edge should always be kept sharp.
CNC turning volume
When turning a slender shaft, the cutting amount should be appropriately reduced compared to ordinary shaft parts. Rough turning with a cemented carbide turning tool, the cutting amount can be as follows
| Workpiece diameter /mm | 20 | 25 | 30 | 35 | 40 |
| Workpiece length /mm | 1000-2000 | 1000-2500 | 10003-000 | 1000-3500 | 1000-4000 |
| Feed/mm.r | 0.3-0.5 | 0.35—0.4 | 0.4-0.45 | 0.4 | 0.4 |
| Cutting depth ap/mm | 1.5-3 | 1.5-3 | 2-3 | 2-3 | 2.5-3 |
| Cutting speed v/mm.s | 40-80 | 40-80 | 50-100 | 50-100 | 50-100 |
For fine turning, use a carbide turning tool to turn a slender shaft of φ20, φ40mm, and a length of 1000-1500mm. Optional f=0.15-0.25mm/r, ap=0.2-0.5mm, v=60-100m/s
3. Technical parameters of the slender shaft
| product | Machinery Parts |
| certificate | ISO9001,ISO/ TS16949 |
| materiál | Alloy steel, uhlíková ocel, nerezová ocel, nerezové železo |
| Povrchová úprava | Oxidation, blackening, galvanizace, leštění, black matt treatment, sandblasting |
| Testing equipment | projector, Roughness Tester, Thread pitch runout measuring instrument, Calipers, micrometer, Lever micrometer, Micro thread calipers, Gauges, Rockwell hardness tester, Webster hardness tester, Diameter gauge, Gear Testing Center, Roundness tester, deflection tester, Only pass rules, High profile, Thread gauge etc. |
| Processing Equipment | CNC obráběcí centrum, CNC lathe, CNC milling machine, Internal and external cylindrical grinders, Centerless grinder , CNC grinder, Automatický soustruh, grinder, Stamping machine, Welding machine, Drill press, Tapping machine, Wire cutting, Thread rolling machine, CNC gear hobbing machine, Surface superfinishing machine, atd. |
| Drawing format | PDF, dwg, CAD,JPG, Solidworks |
| Production capacity | 100,000 pcs/month |
| Size range | OD: Φ4mm-Φ50mm, length ≤700mm |
| Application field | Fitness equipment, automobilů, air conditioners, household appliances, office appliances, lékařské vybavení, atd. |
| package | Plastic bag + carton + (pallet), plastic bag + wooden box, according to customer requirements |
| Čas doručení | Sample: 10-15 dní; Batch: According to the order quantity |
- Machining accuracy of shaft
| Roundness | 0.001mm |
| Roughness | Ra0.04 |
| Flatness | 0.001mm |
| hardness | HRC/HV |
| Precision | Level 6 |
| tolerance | +/-0.001mm |
- Advantages of the shaft manufacturer
① Precise customized processing of drawings and samples;
② A shaft manufacturing enterprise, with more than 20 years of experience in precision shaft machining, and strong technical support. Advanced processing equipment, complete inspection equipment and a strong logistics inspection team;
③ 100% factory inspection, quality assurance;
④ Strong productivity and short processing cycle.6. Machining of common shaft materials
| nerezová ocel | SS201,301,304,SS303,SS304,SS316 |
| Carbon steel | 20#,35#,45# |
| Stainless iron | 1Cr17,2Cr13,3Cr13,6Cr13,7Cr17 |
| Other commonly used alloy steels | 35CrMo,20Cr,40Cr,40CrMo,42CrMo,20CrMnTi,20CrMMnMo |
- Povrchová úprava
| nerezová ocel | Other steel materials |
| leštění | Blackening |
| plating | Pozinkované |
| Sandblasting | Nickel plated |
| Laser engraving | Chrome plating |
| Carburizing | |
| Tepelné zpracování |
- Strict inspection standards
① A strong QC team;
② Incoming inspection of raw materials;
③ First inspection, patrol inspection, random inspection;
④ 100% factory inspection.
 English
 العربية
 中文(漢字)
 Čeština
 Dansk
Dansk Nederlands
 Suomi
Suomi Français
 Deutsch
 Italiano
 日本語
日本語 ಕನ್ನಡ
ಕನ್ನಡ 한국어
한국어 Português
 Русский
 Slovenčina
 Español
 Svenska
 Türkçe

